This post may contain affiliate links. Please read our disclosure policy.
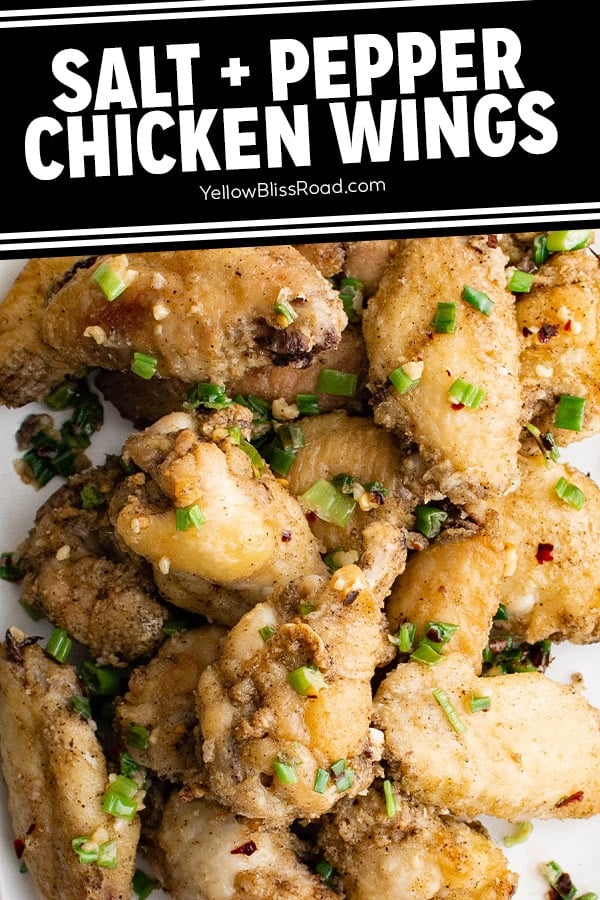
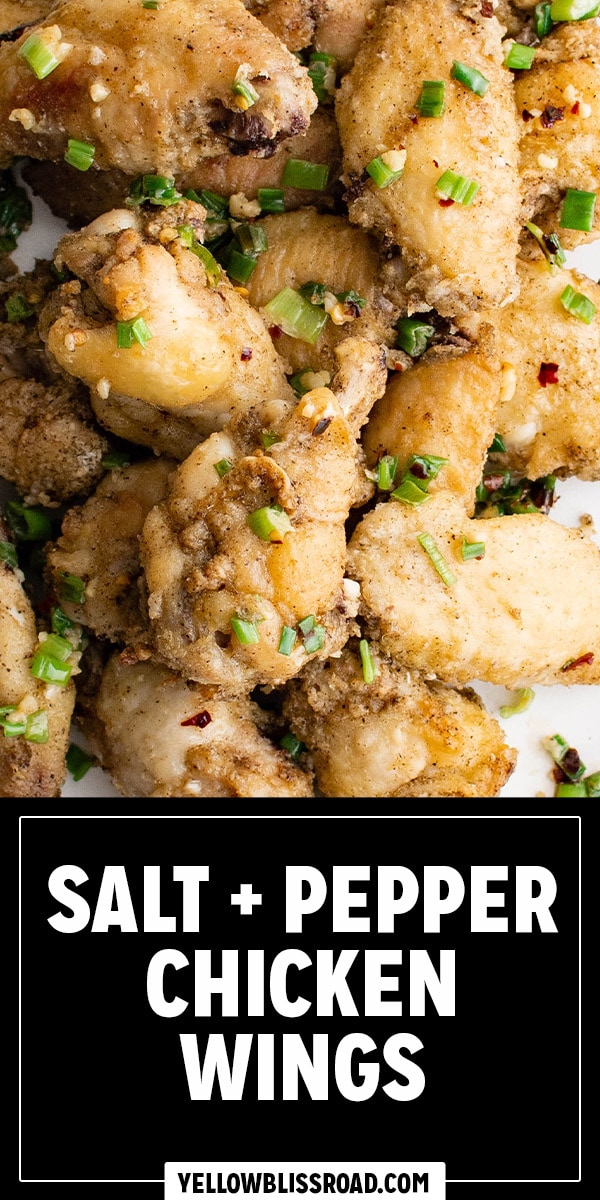
Crispy and downright delectable, my crispy oven baked Salt and Pepper Wings are finger-licking good! This recipe uses my simple method for getting crispy baked wings and then coats them in a savory salt and pepper sauce.
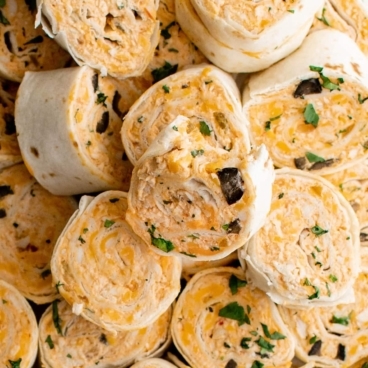
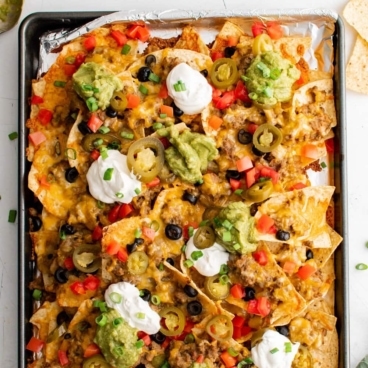
Salt and Pepper Chicken Wings are great as a meal served with Chow Mein or steamed rice, or as part of an epic game day spread, paired with other savory snacks like Fried Pickles or Sheet Pan Nachos.

Table of Contents
Why You’ll Love This Salt and Pepper Wings Recipe
There are few appetizers more widely beloved than chicken wings, and for good reason. They’re easy to eat with your hands, relatively inexpensive, and high in protein, meaning they are heartier and more filling than a bag of potato chips.
My salt and pepper wings recipe is:
- Healthier than the alternative. This recipe for baked wings comes out just as tasty and crispy as the kind you’d get at your favorite sports bar, but with a fraction of the fat.
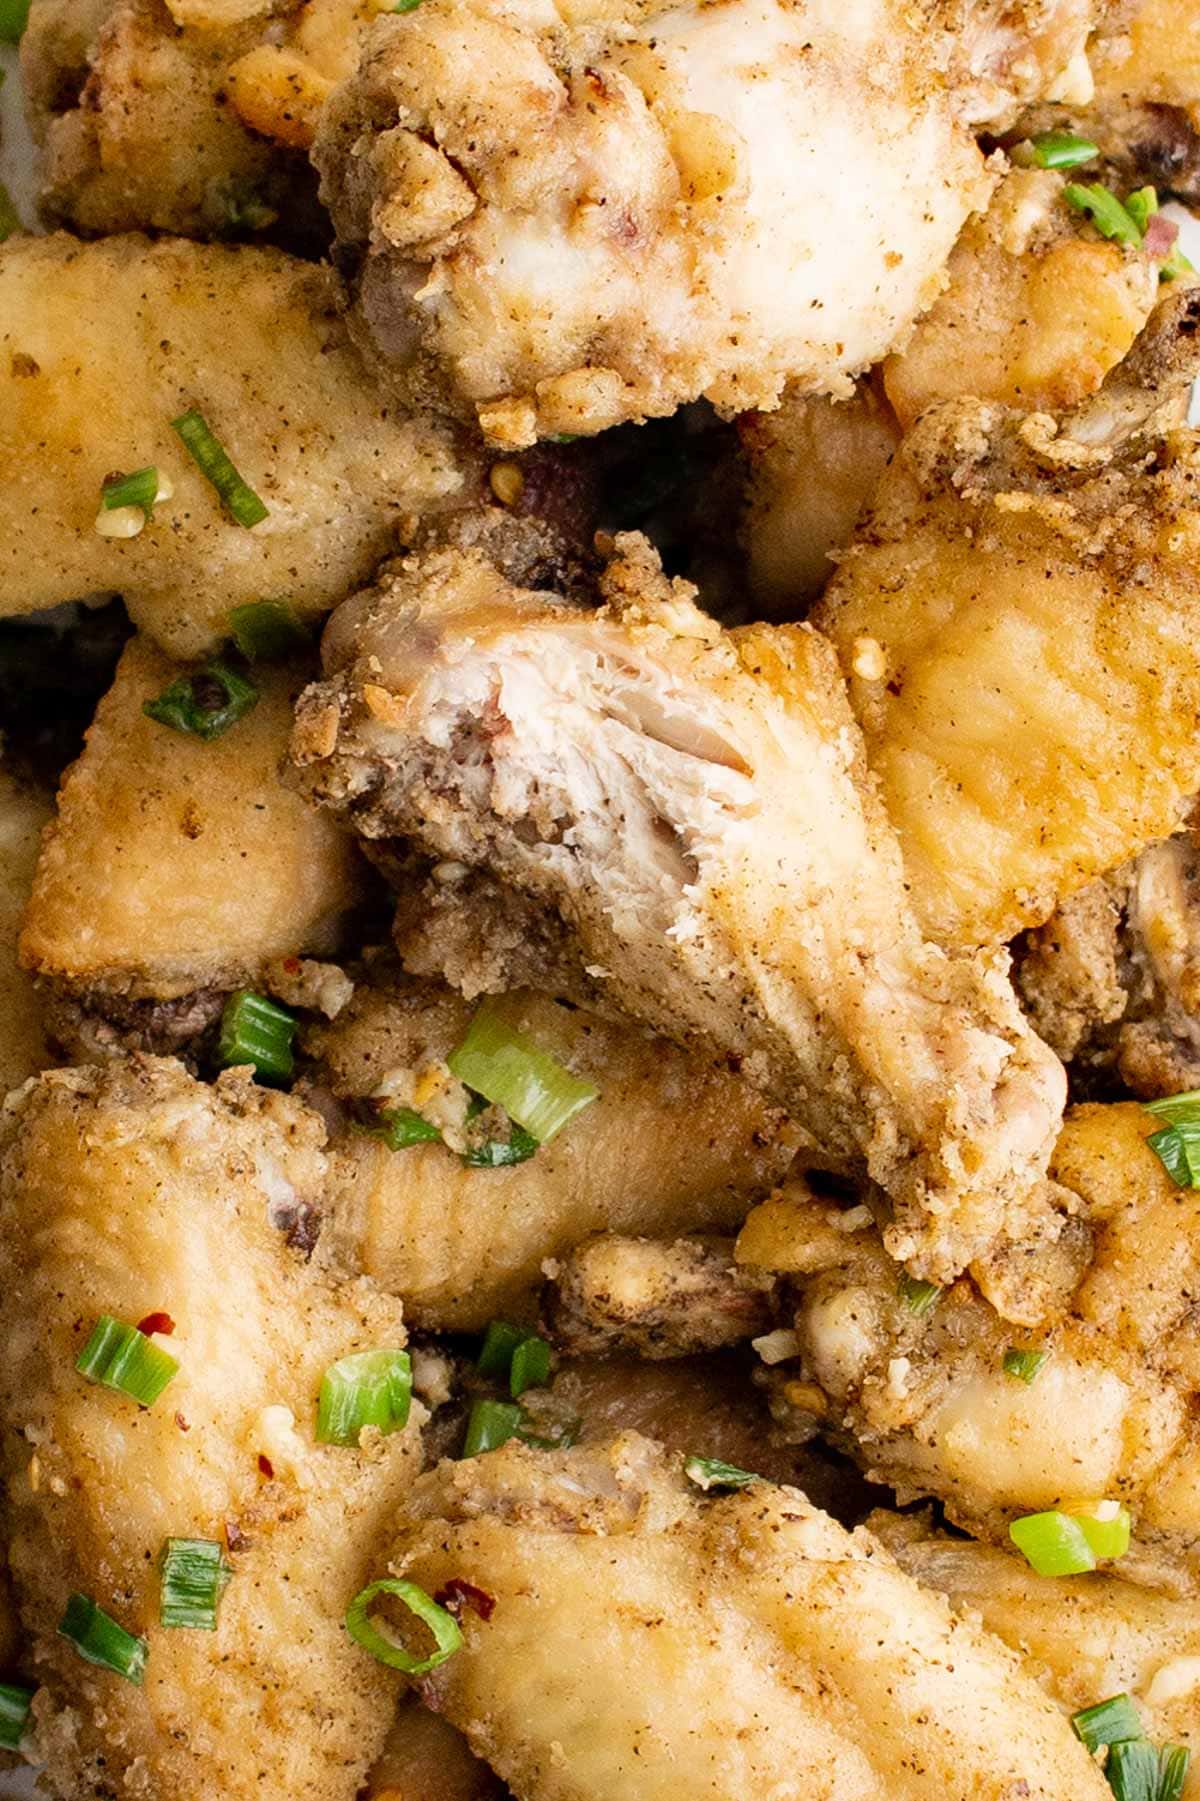
- So simple, yet incredibly delicious. These crispy, juicy crispy wings, are salty and savory, with a kick of spicy black pepper.
Ingredients
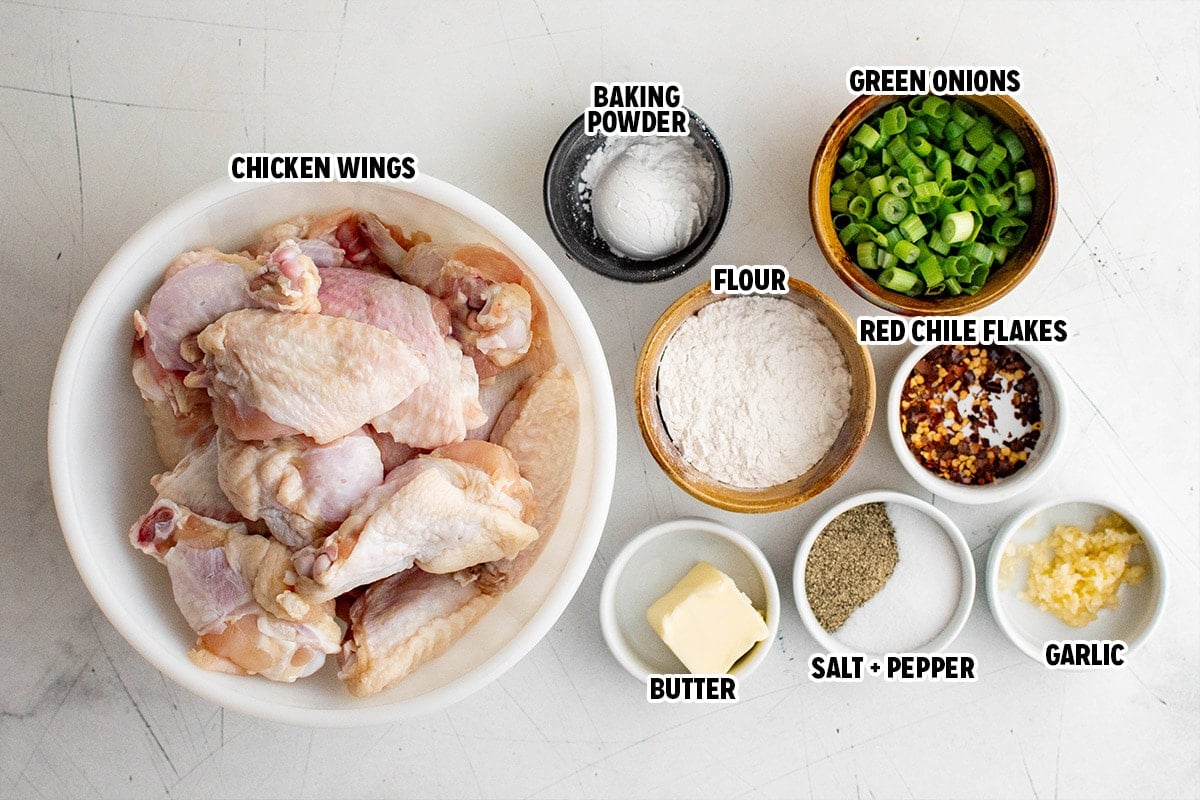
- Chicken Wings or Drumettes – Fresh or frozen and thawed. Depending on your grocery store, you may be able to choose all flats or all drumettes.
- Kosher Salt & Black Pepper – For the best flavor, I suggest using freshly cracked black pepper and kosher salt.
- All-Purpose Flour – To get your baked wings nice and crispy in the oven, you’re going to need a dredge.
- Baking Powder – A crucial ingredient to getting the skin extra crispy. Do not use baking soda.
- Butter – For the sauce.
- Garlic – Fresh cloves are always my preference because they just taste better. That said, you can easily swap in jarred minced garlic, or use ¼ teaspoon of garlic powder per clove.
- Green Onions – Use the whole stalk, less the root end and any scraggly looking greens, saving some of the bright green tops for your garnish.
- Red Pepper Flakes – I like adding a little extra heat to most things; feel free to omit them if you are not a spicy foods lover.
How To Make Baked Salt and Pepper Wings
See recipe card below for ingredient quantities and full instructions.
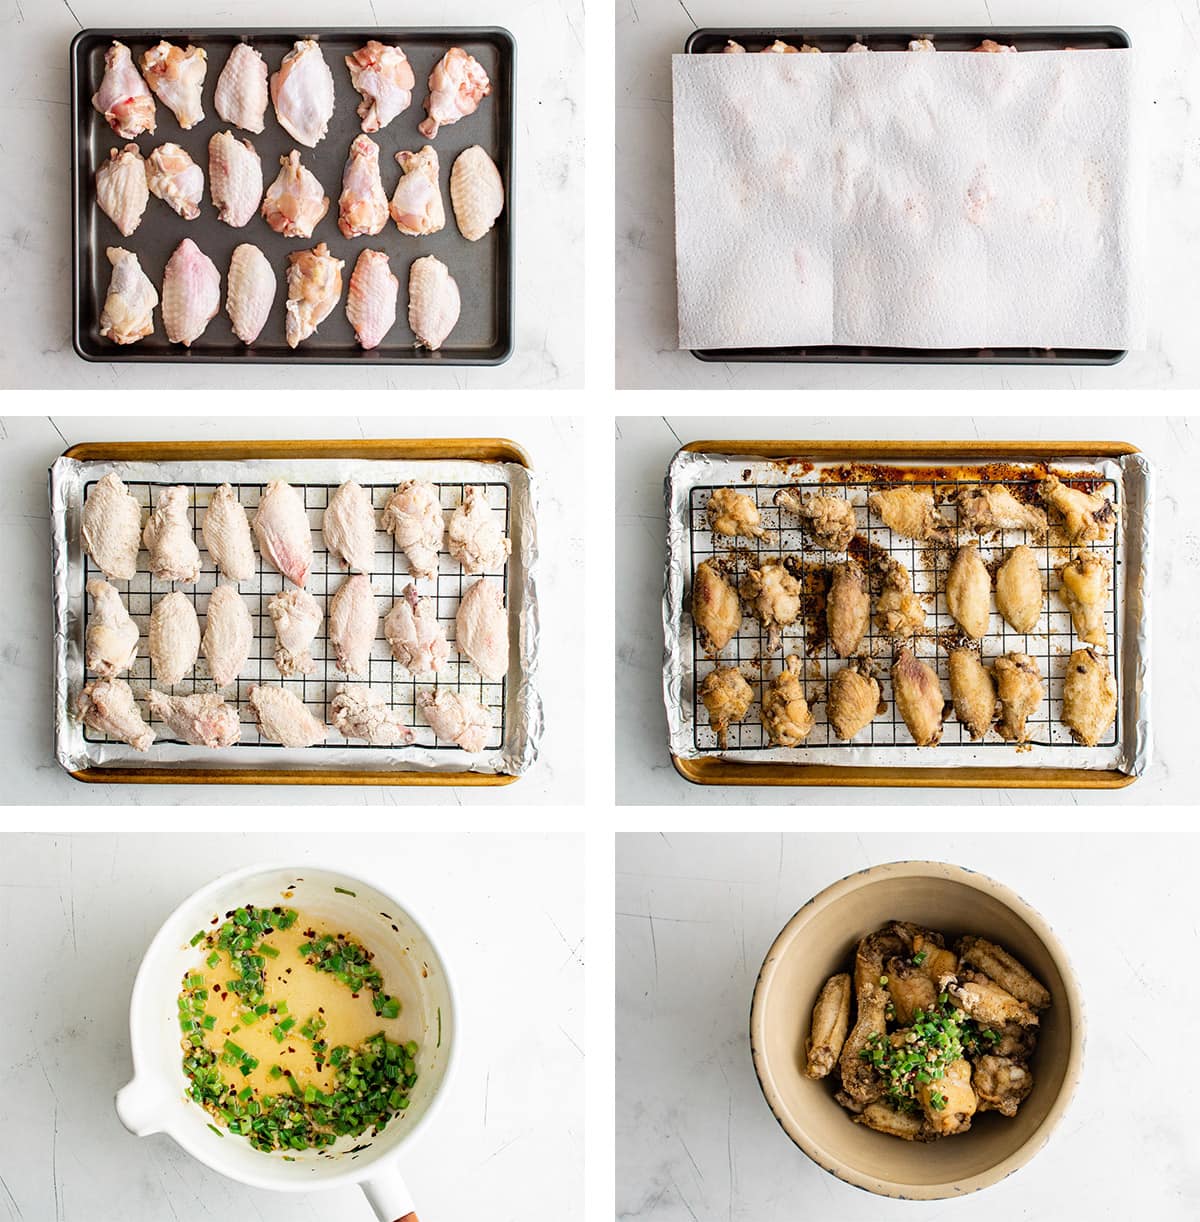
- Dry Chicken: Pat the wings dry with paper towels, arrange on a baking rack placed over a baking sheet and rest in the fridge to dry out the skin.
- Prep: Cover a baking sheet with foil, top with a baking rack, and spray with foil. Preheat the oven to 450℉.
- Coat Chicken: In a large bowl, whisk together flour, baking powder, salt, and pepper. Toss chicken wings with the flour mixture and shake off excess.
- Bake: Arrange chicken on the rack, close together but not touching. Bake for 30-35 minutes, rotating the baking sheet about halfway through. You do not need to flip the chicken. NOTE – if they don’t look crispy right away, give them a few more minutes. But they will get crispier as they cool.
- Make Sauce: While the chicken is cooking, make the sauce. Melt butter with garlic, red chile flakes, and green onions, and saute for a couple of minutes over medium-low heat. You want the garlic to brown, not burn, so be sure to keep the heat low.
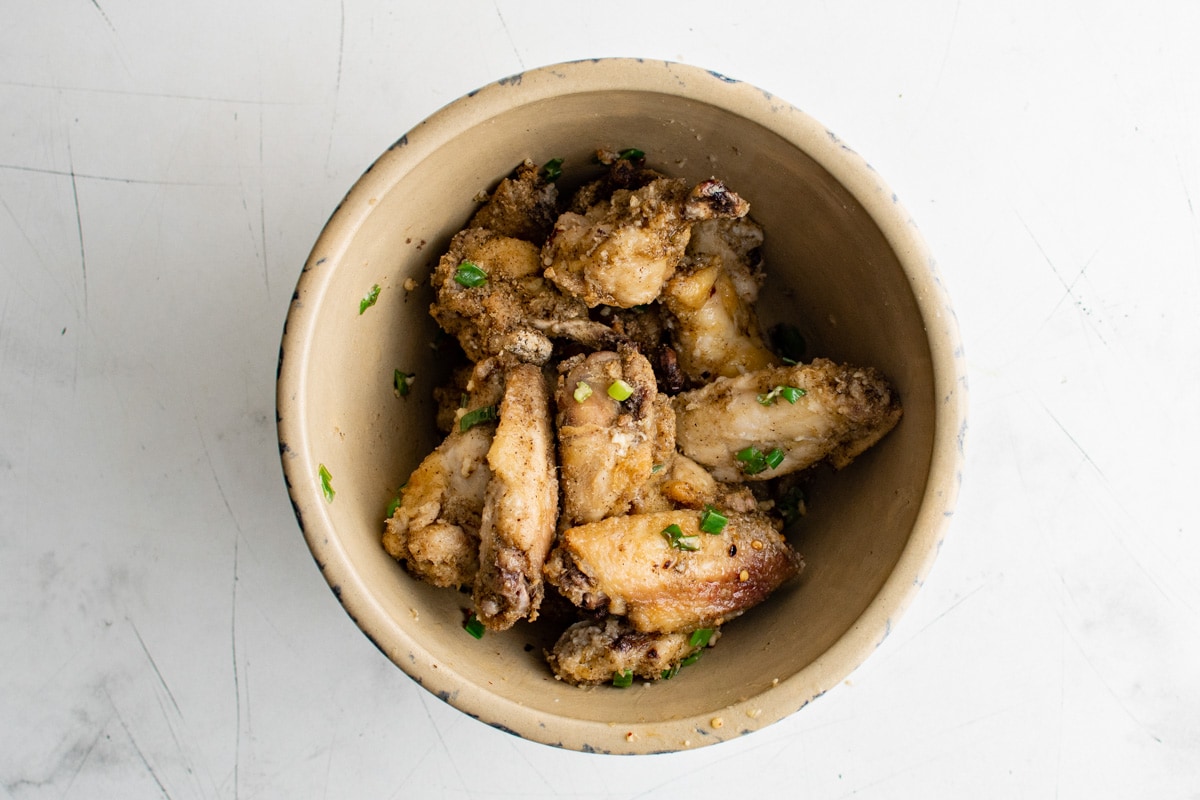
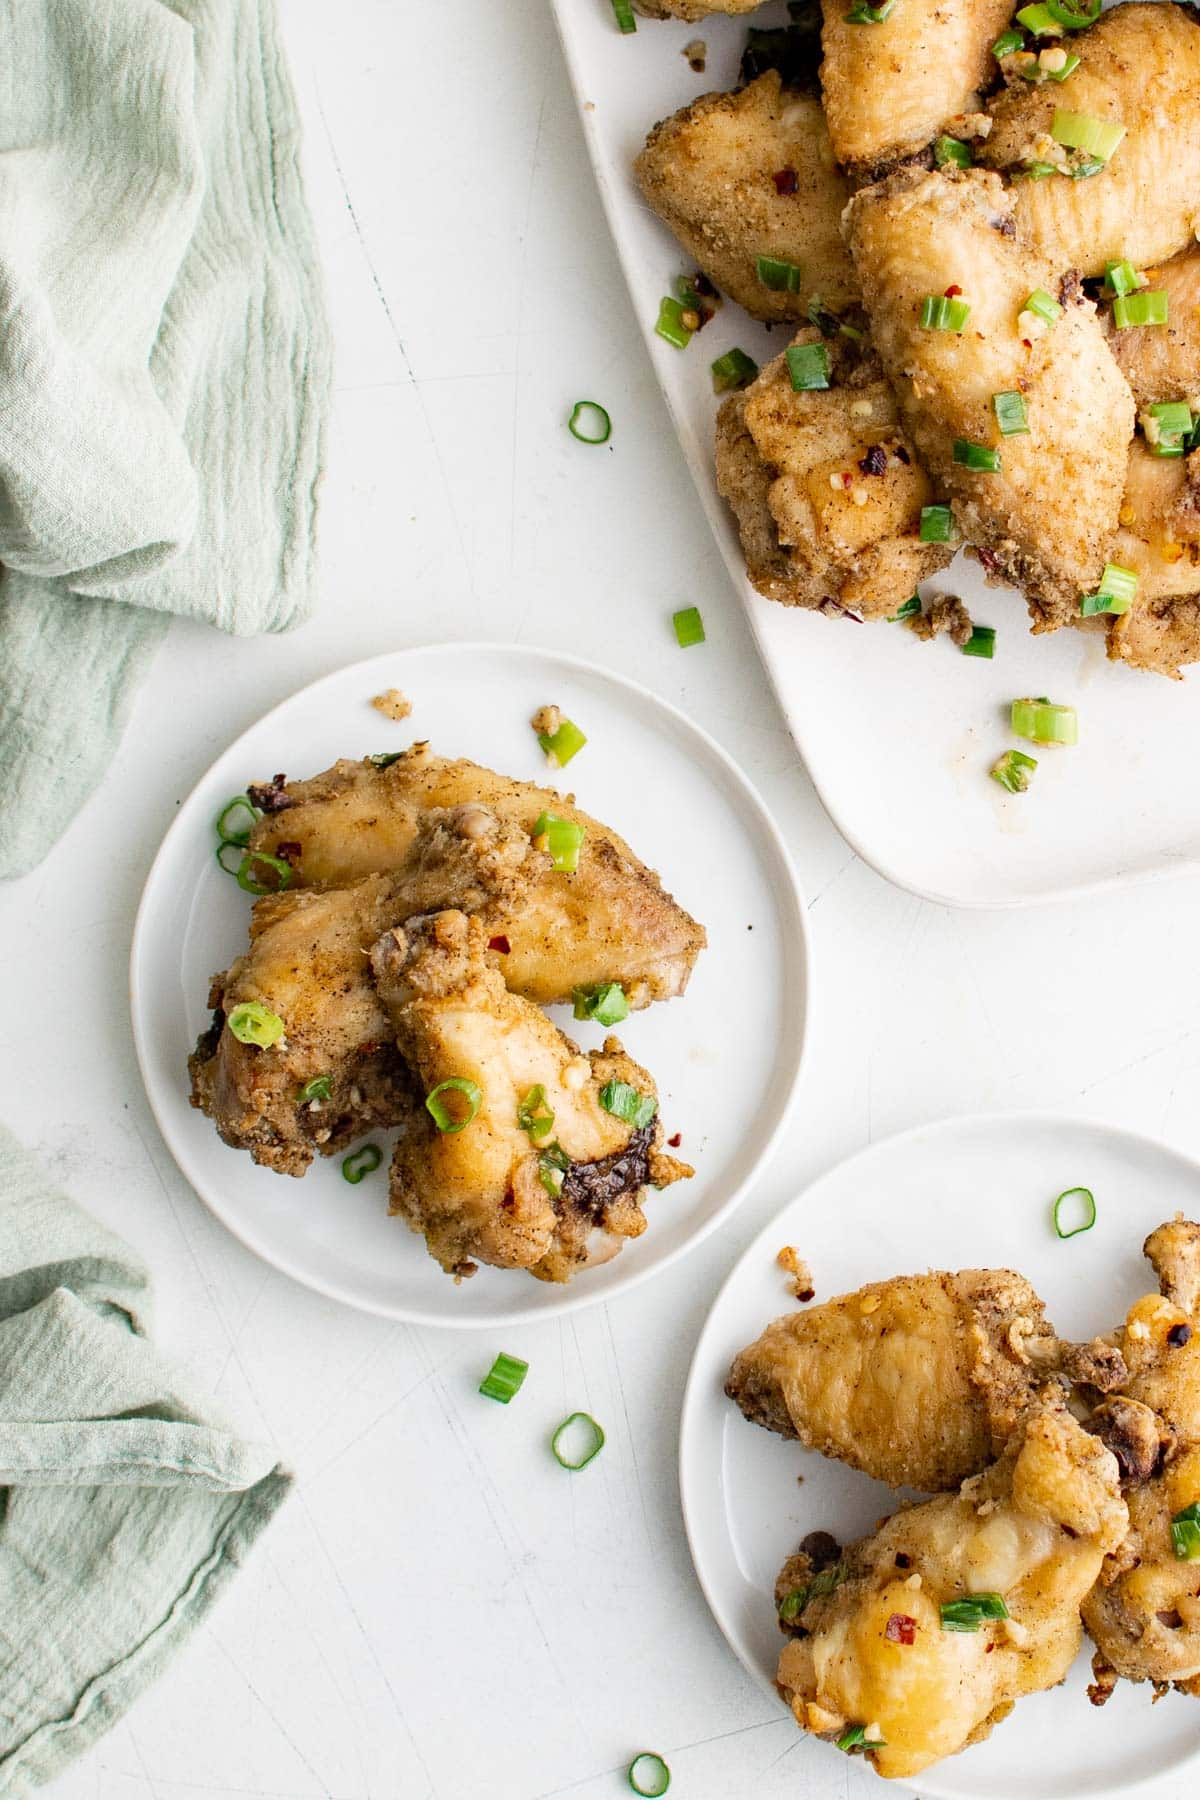
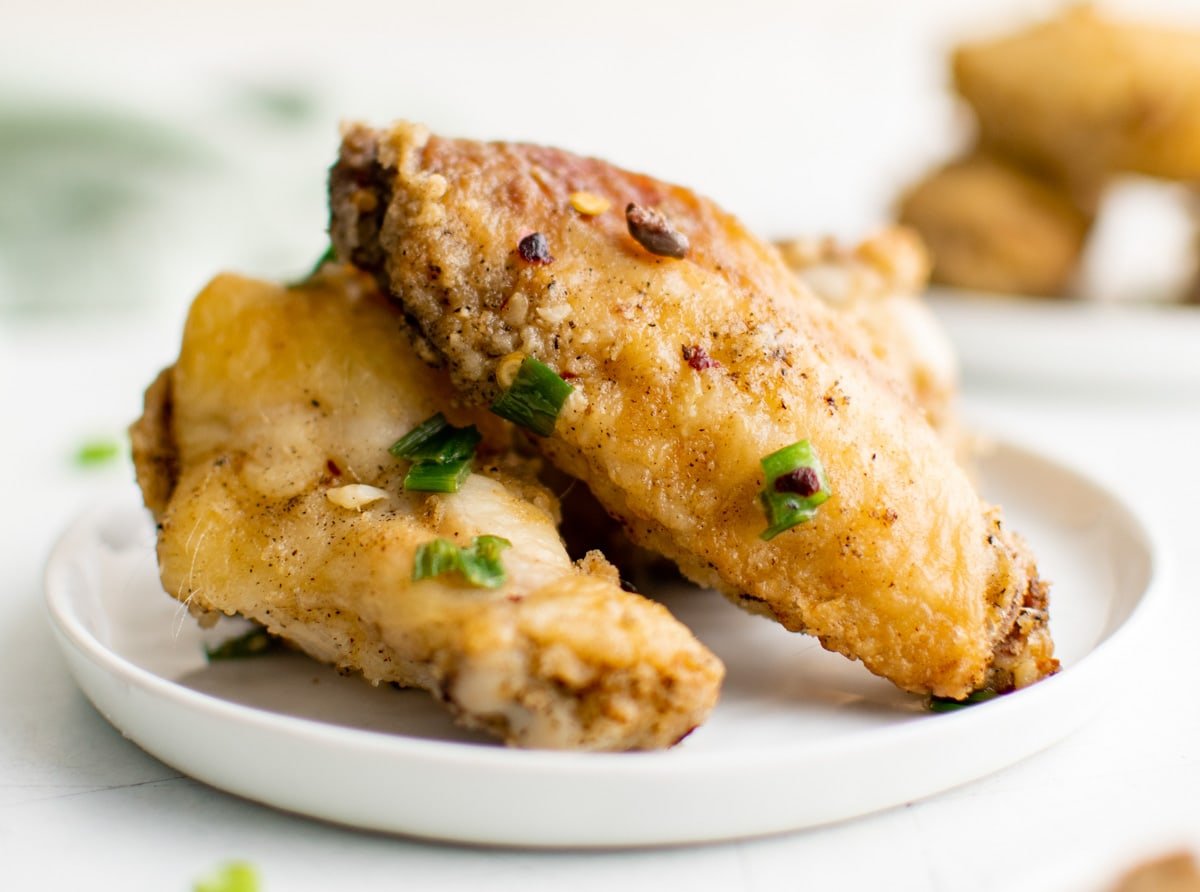
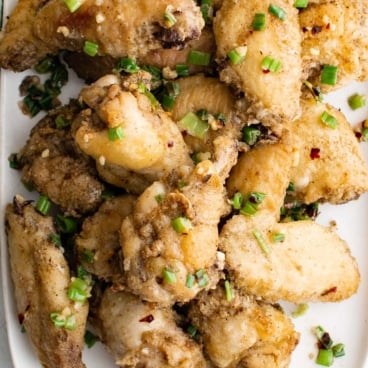
- Toss & Enjoy! Transfer crispy wings to a large bowl and toss with the sauce. Serve on a platter and garnish with fresh, thinly sliced green onions.
FAQs
Sure thing! Set your air fryer to 400°F, then cook for 8-12 minutes per side. Be sure to keep an eye on them though; we don’t want them to burn!
Technically speaking, yes, you can. However, I don’t suggest that you do, primarily because you simply won’t be able to get the nice crispy exterior without *at least* patting the defrosted wings dry, and preferably air-drying them in the fridge overnight.
This common baking ingredient might sound like a weird addition to your chicken wings, but this is a crucial ingredient to getting the skin extra crispy.
Baking powder is actually an alkaline substance, so it increases the pH of the chicken skin, which then hastens the Maillard reaction (nerd speak for browning). Don’t use baking soda in its place here; it will cause your wings to taste bitter.
Yes, with the addition of black pepper, garlic and red chile flakes, these wings have a nice bit of heat. However, you can adjust the heat level based on your preferences.
Sure, if you would prefer to fry the chicken wings you can certainly do so. Make sure you use a heavey bottomed pot with high sides, and an oil with a high smoke point.
Storing and Reheating
Storage: Leftovers should be stored in an airtight container in the refrigerator for up to 3-4 days.
Freezing: It’s best to freeze wings without the sauce, but either way will work. Place cooled wings in a plastic freezer bag and freeze for up to 3 months.
Reheating: If you have an air fryer, that’s the best way to reheat wings. If not, arrange them on a baking sheet and bake at 350°F until heated through and crispy.
Helpful Tips
- Know your measurements. There’s nothing worse than hosting a party and running out of food. If you are serving these as part of a larger spread, I’d suggest offering 3-4 pieces per person; for a meal, I’d suggest 6-10 pieces per person. For your calculations, there are typically 10-12 pieces in a pound of wings (including wings and drumettes).
- Take the time to dry your wings in the refrigerator. Moisture and “crispy” are about as compatible as oil and water. If you can, plan in advance to air dry your wings (in the refrigerator, of course!) for at least a few hours and preferably overnight. You’ll thank me when you bite into your first crunchy wing!
- Use a rack if you have one. Having the additional airflow under the wings helps to achieve their extra crispy status. If you don’t have one on hand, you can cook the wings directly on foil that has been coated with non-stick spray, but you’ll need to flip them about halfway through their bake time.
More Chicken Wing Recipes To Try
- Air Fryer Chicken Wings
- Baked Buffalo Chicken Wings
- BBQ Chicken Wings
- Garlic Parmesan Chicken Wings
- Lemon Pepper Wings
- Boneless Buffalo Wings
Salt and Pepper Wings Recipe
Ingredients
- 3 pounds chicken wings or drumettes
- 3 teaspoons salt
- 4 teaspoons black pepper
- 2 tablespoons all-purpose flour
- 1 tablespoon baking powder
- 2 tablespoons butter
- 4 garlic cloves minced
- 1 bunch green onions chopped save some of the greens for garnish
- ½ teaspoon red chile flakes
Instructions
- Pat chicken wings dry with paper towels. Arrange wings on a baking sheet (touching is fine), cover with paper towels and place in the refrigerator for several hours. Overnight is ideal. If you don’t have the time, you can skip this step, just be sure to pat them as dry as possible with the paper towels.
- Cover a large baking sheet with foil and top with a baking rack. Spray the rack over the baking sheet with nonstick cooking spray.
- Preheat the oven to 450°F.
- In a large bowl, whisk together flour, baking powder, salt and pepper. Add chicken and toss to coat with the flour mixture. Shake off excess.
- Arrange chicken on the rack, close together but not touching.
- Bake for 30-35 minutes, rotating the baking sheet about halfway through. You do not need to flip the chicken. NOTE – if they don’t look crispy right away, give them a few more minutes. But they will get crispier as they cool. You could also put them under the broiler for a few minutes to get them crispier.
- While the chicken is cooking, make the sauce. Melt butter in a saucepan over medium-low heat. Add garlic, red chile flakes and green onions and saute for a couple of minutes over medium-low heat. You want the garlic to brown, not burn, so be sure to keep the heat low.
- Transfer crispy wings to a large bowl. Pour the sauce over the wings and toss to coat.
- Serve on a platter garnished with fresh, thinly sliced green onions.
Notes
- Storage: Leftovers should be stored in an airtight container in the refrigerator for up to 3-4 days.
- Freezing: It’s best to freeze wings without the sauce, but either way will work. Place cooled wings in a plastic freezer bag and freeze for up to 3 months.
- Reheating: If you have an air fryer, that’s the best way to reheat wings. If not, arrange them on a baking sheet and bake at 350°F until heated through and crispy.
- Servings: There are 8-10 wings in a pound. As an appetizer, plan on 3-4 wings per person. As a meal, 6-8 per person.